
Salesforce Commerce Cloud Katalys Bridge
Install the Katalys Merchant Sales Bridge plugin and connect your Salesforce Commerce Cloud store by following the steps below ( or watch the video tutorial ):
STEP 1: Install the Katalys plugin:
-
Navigate to Katalys/data folder:
-
Rename data/sites/site_name to your site
-
Zip the data folder
-
-
Log into your Business Manager:
-
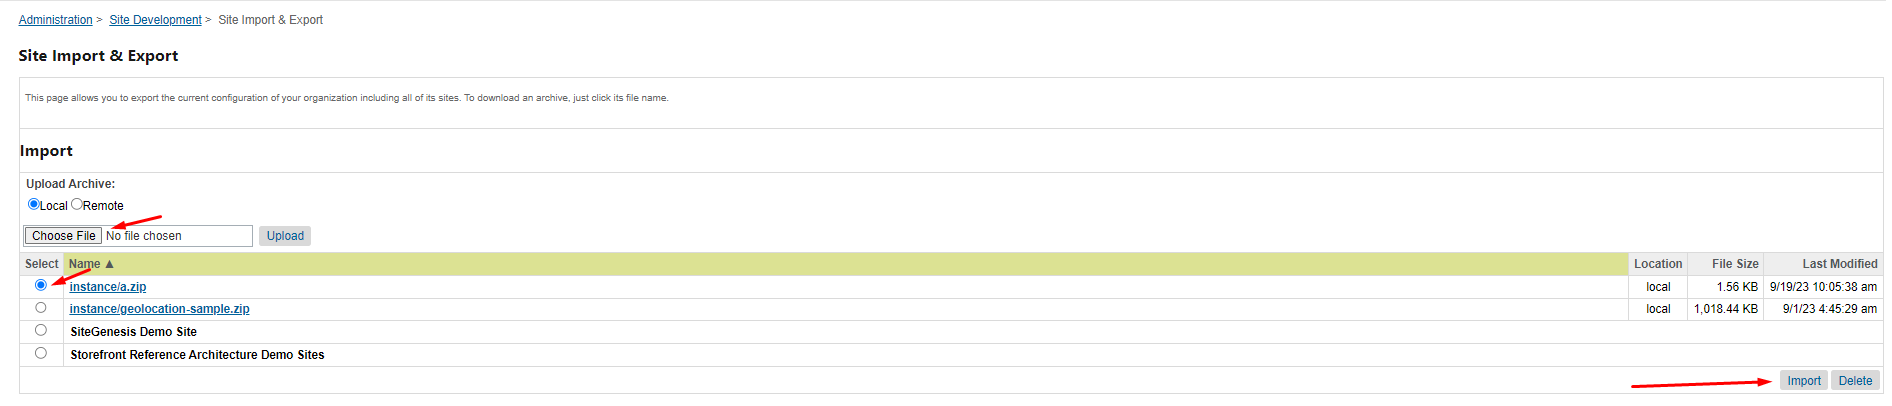
Go to Administration > Site Development > Site Import & Export
-
Click 'Choose file'
-
Upload your zip folder (data.zip)
-
Import the zipped folder:
-
-
Go to Administration > Sites > Manage Sites > Your Site - Settings tab and add 'plugin_katalys' to the cartridges path. It should be placed after your main cartridge:
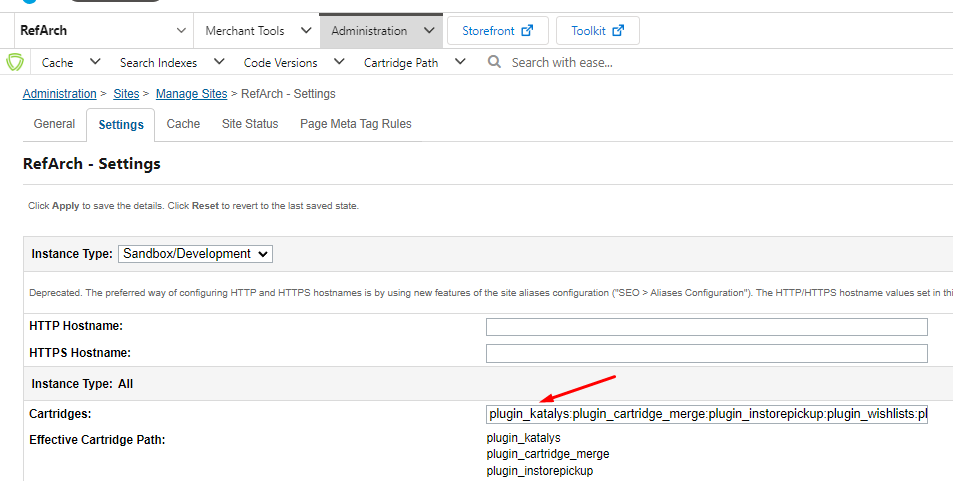
Now you will have Katalys' site preferences in your Business Manager, and you can continue to Step 2: Connecting your store with Katalys.
Step 2: Connecting your store with Katalys:
-
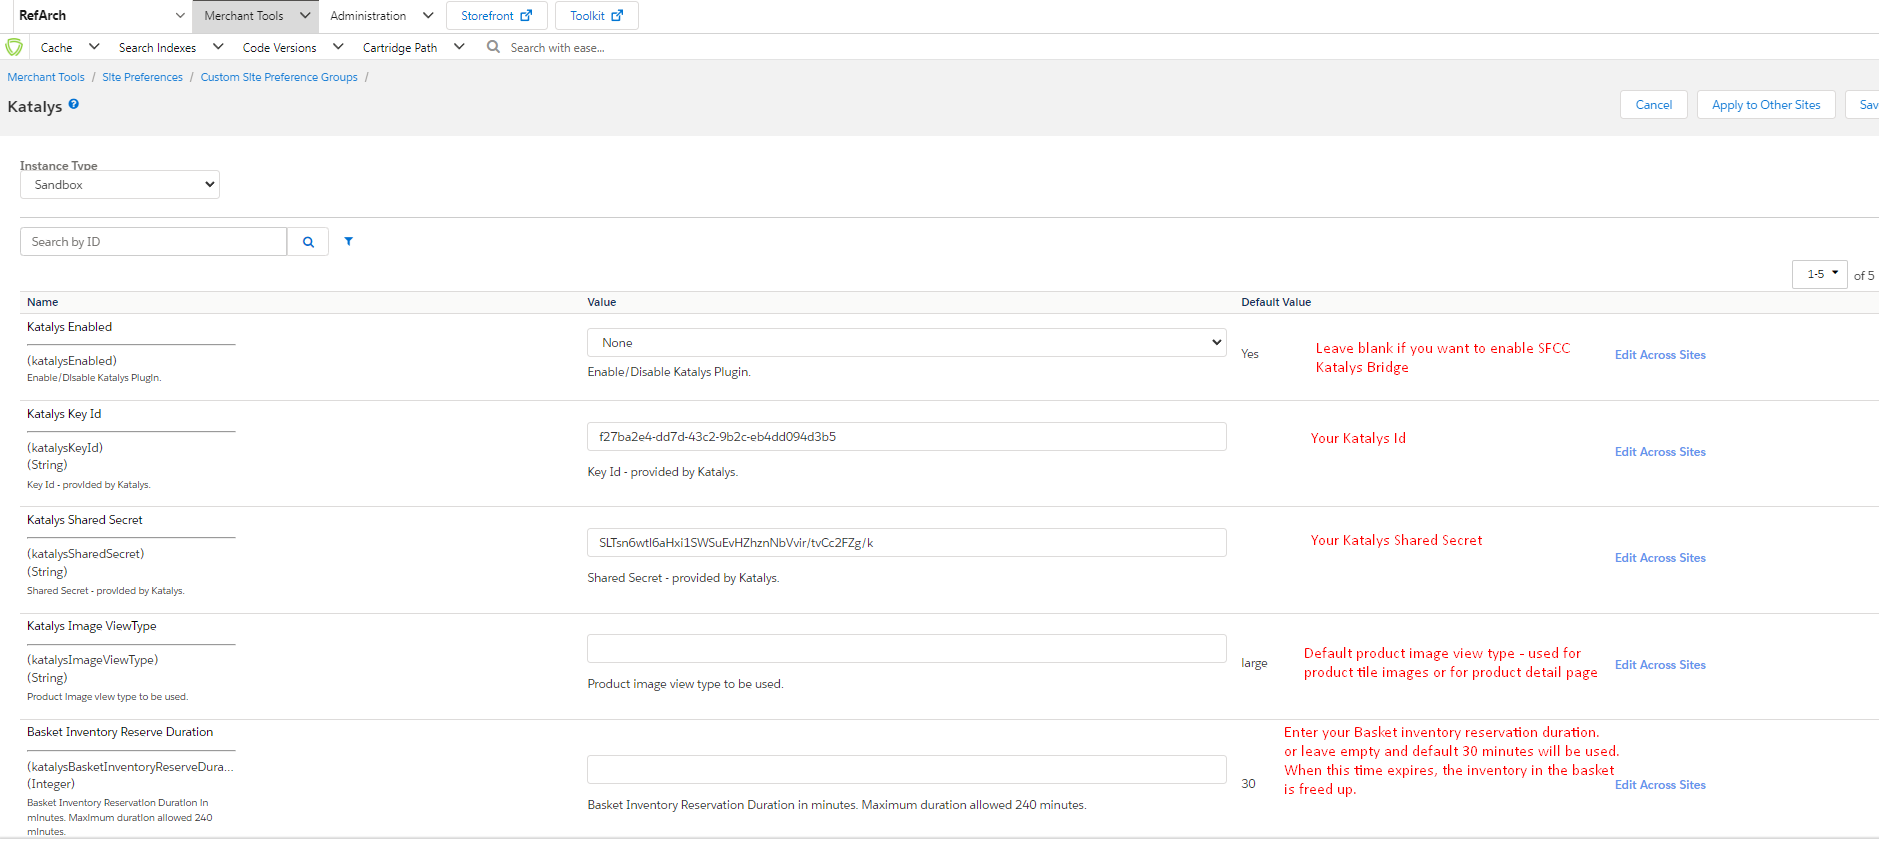
Go to Merchant Tools > Site Preferences > Custom Site Preference Groups > Katalys
-
Populate the following fields:
-
Katalys Enabled: leave blank if you want to enable SFCC Katalys Bridge
-
Katalys Key ID: You will get this information after completing Step 3
-
Katalys Shared Secret: You will get this information after completing Step 3
-
Katalys Image ViewType: default image view type, leave empty for the default large view type
-
Basket Inventory Reserve Duration: duration of the basket's inventory reservation, leave empty for the default 30 minutes. When this time expires, the inventory in the basket is freed up.
-
-
Services configuration
-
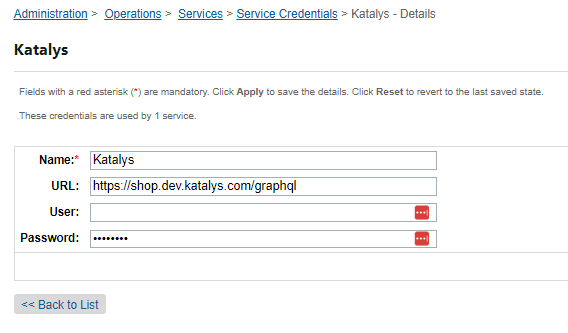
Go to Administration > Operations > Services > Service Credentials > Katalys - Details:
-
For production environment use: https://shop.katalys.com/graphql
-
For development environment use: https://shop.dev.katalys.com/graphql
-
-
STEP 3
-
Go to your Katalys Dashboard and navigate to:
Settings → Stores → Add Store → Custom Integration -
Input the form
-
Online store name - example: Brand Store
-
Developer Email to be notified on error: shop-support@katalys.com
-
Fallback Email to notified on error: shop-support@katalys.com
-
Endpoint for accepting Katalys orders and Events:
-
Production URL
Enter your site’s base URL in the following format:https://<my.store.com>/en-us/directives
Replace<my.store.com>with your actual domain. -
Sandbox URL
in case you want to use it is in the format:
-
-
Sandbox URL should be in the following format
https://<4 letter code>-001.dx.commercecloud.salesforce.com/on/demandware.store/Sites-<Your site name>-Site/en_US/Directives-Handle-
Change
<4 letter code>and<Your site name> -
Note: If you have aliases set up on your sandbox, use appropriate alias hostname, and add a pipeline URL to Merchant Tools > SEO > URL Rules > Pipeline URLs same as for Production set up above.
-
-
-
Katalys will fire a Health Check directive automatically which will fail at first. To make it work take the following steps:
-
Navigate to:
API Keystab and copy and paste key information as described in Step 2: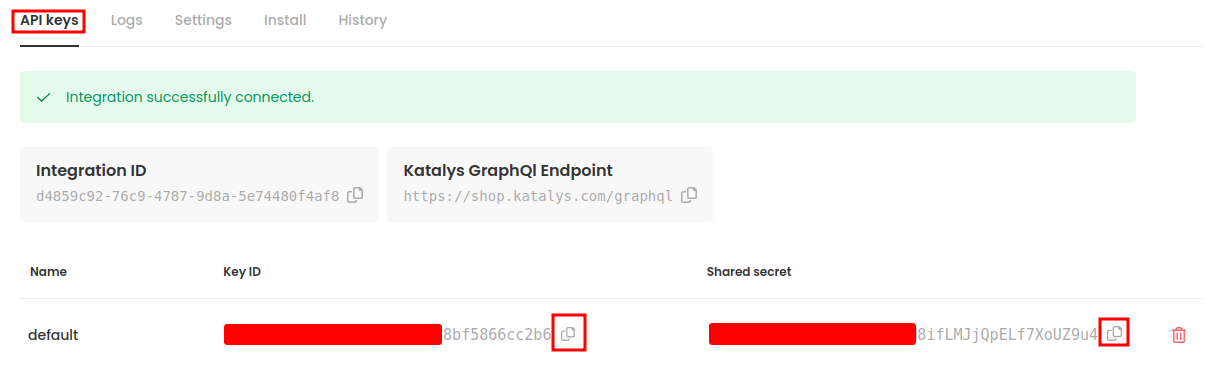
-
Make sure you add a pipeline URL to Merchant Tools > SEO > URL Rules > Pipeline URLs with the bellow record:

-
-
To verify every thing works correctly navigate to the
Logstab and click Healthcheck
Congrats! You're done! You can now test your store by importing product, by copying the public URL of a PDP and place an order.