
Katalys requires Advertisers to include our tracking pixel on Landing Pages (for fraud detection and user verification) and on Thank You pages (for capturing conversions).
There are 2 parts to integrating with Katalys:
-
Visitor Reporting
This is a JavaScript file that will record clicks and incoming transaction IDs. It records when someone lands on your site from our network. -
Order Reporting
This can be accomplished by installing our WooCommerce or Shopify plugins, or via a custom JavaScript implementation on the Thank You page of a checkout flow.
Part 1: Visitor Reporting
You can use Google Tag Manager to easily deploy your account’s JavaScript snippet site-wide. Minimally this must be done on pages that will potentially receive traffic from our affiliates, but it’s safer to simply launch site-wide. This script will record when visitors land on your pages from the Katalys Network.
-
Retrieve your Katalys Tracking Script
Your JavaScript snippet is unique to each Tracking ID within your Katalys account.-
Select your Tracking ID you are installing into Google Tag Manager.
-
Click “Connect a Data Source” and click “Google Tag Manager”.
-
Copy the code snippet in Step 1.
-
Add a new tag to your GTM container
Go to your Google Tag Manager workspace and select the correct account and tag. Click “Add a new new tag”.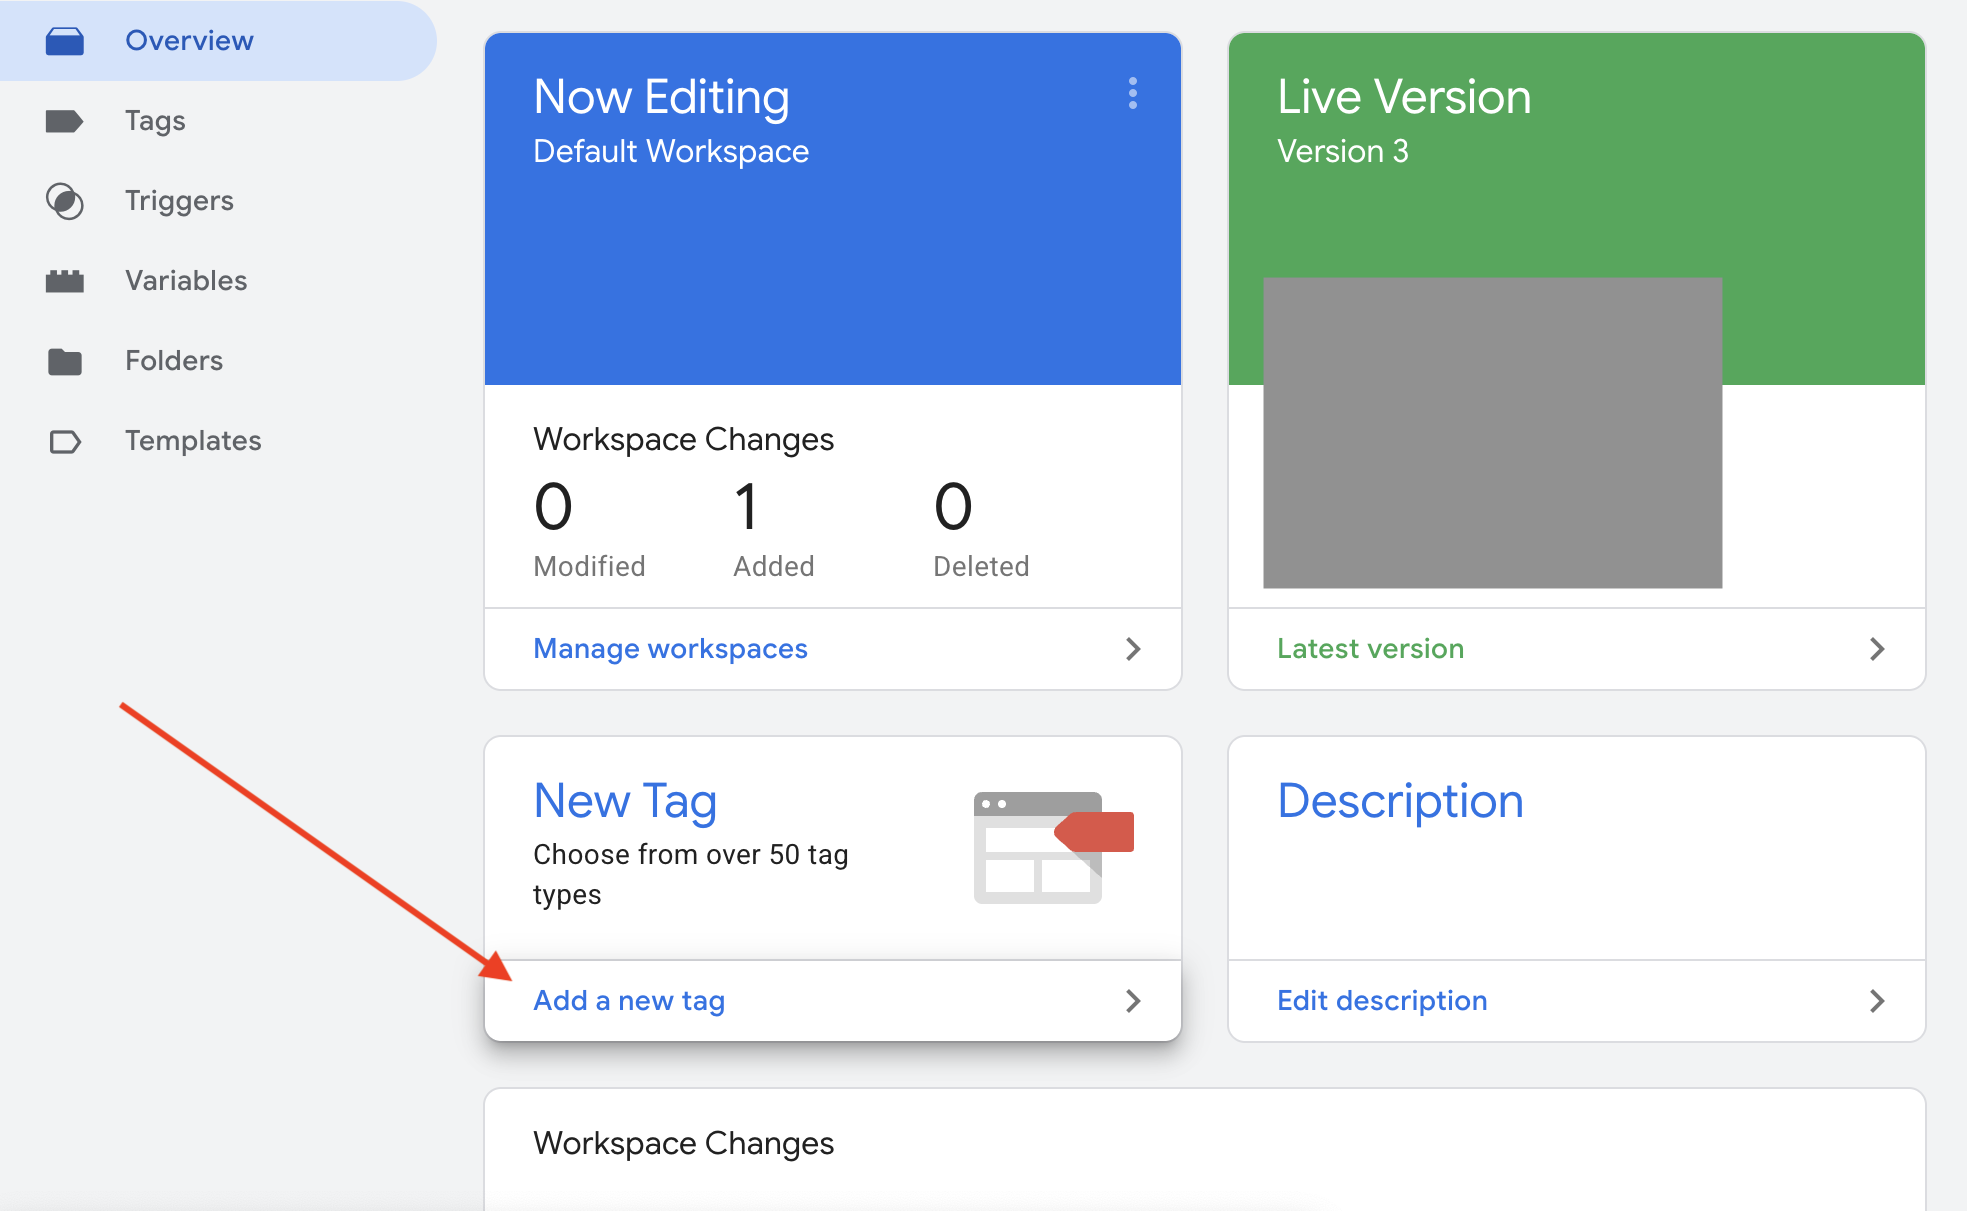
-
Configure your new tag
Name your tag “Katalys Tracking Script”. Click “Tag Configuration” to select the Tag Type and select “Custom HTML” for the Tag Type. Then paste your Katalys Tracking Script into the HTML field.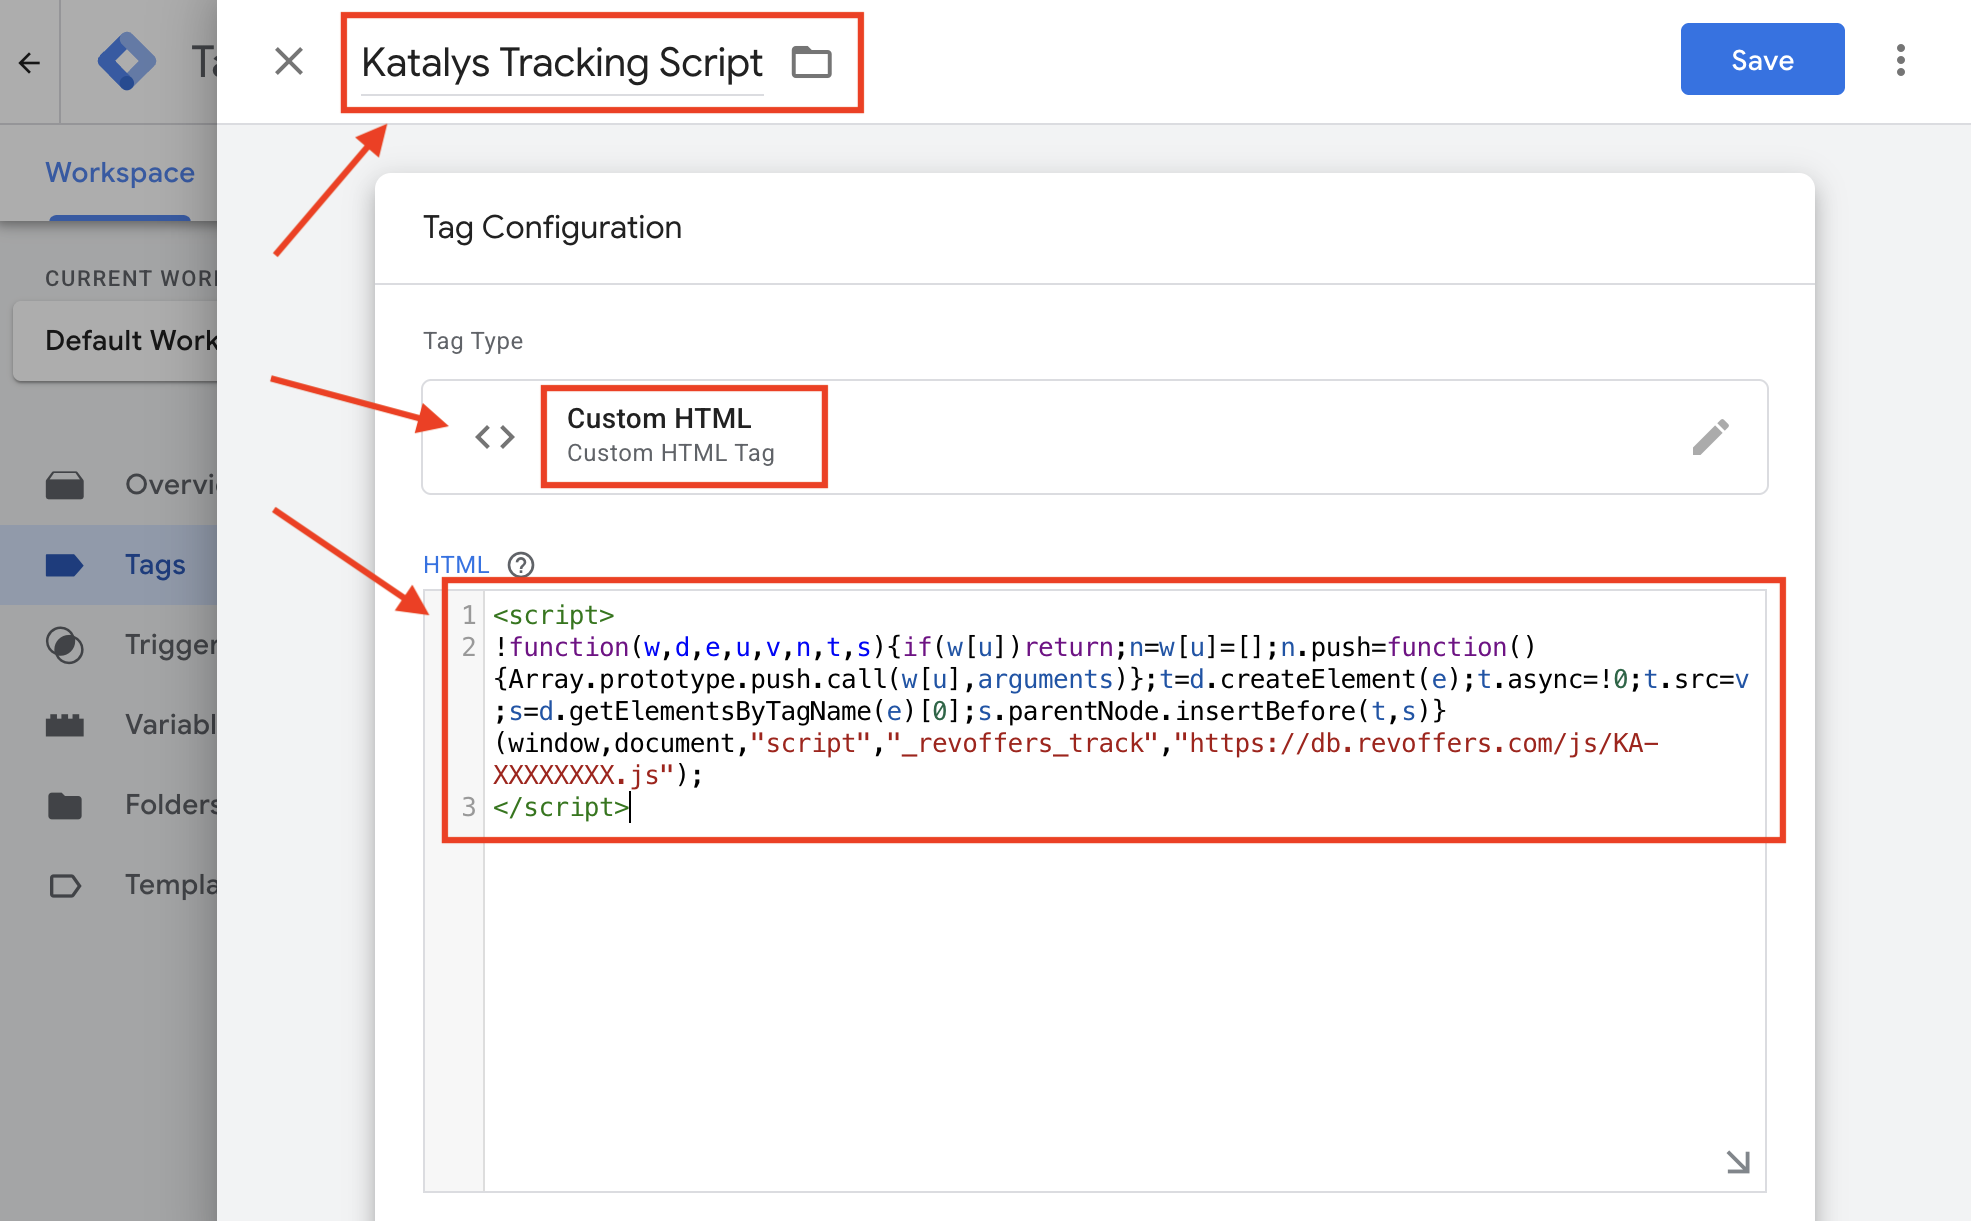
-
Configure your tag’s triggers
Scroll down and click “Triggering”. Select the “All Pages” Trigger of type “Page View”. Then click the ‘Save’ button to finalize the configuration.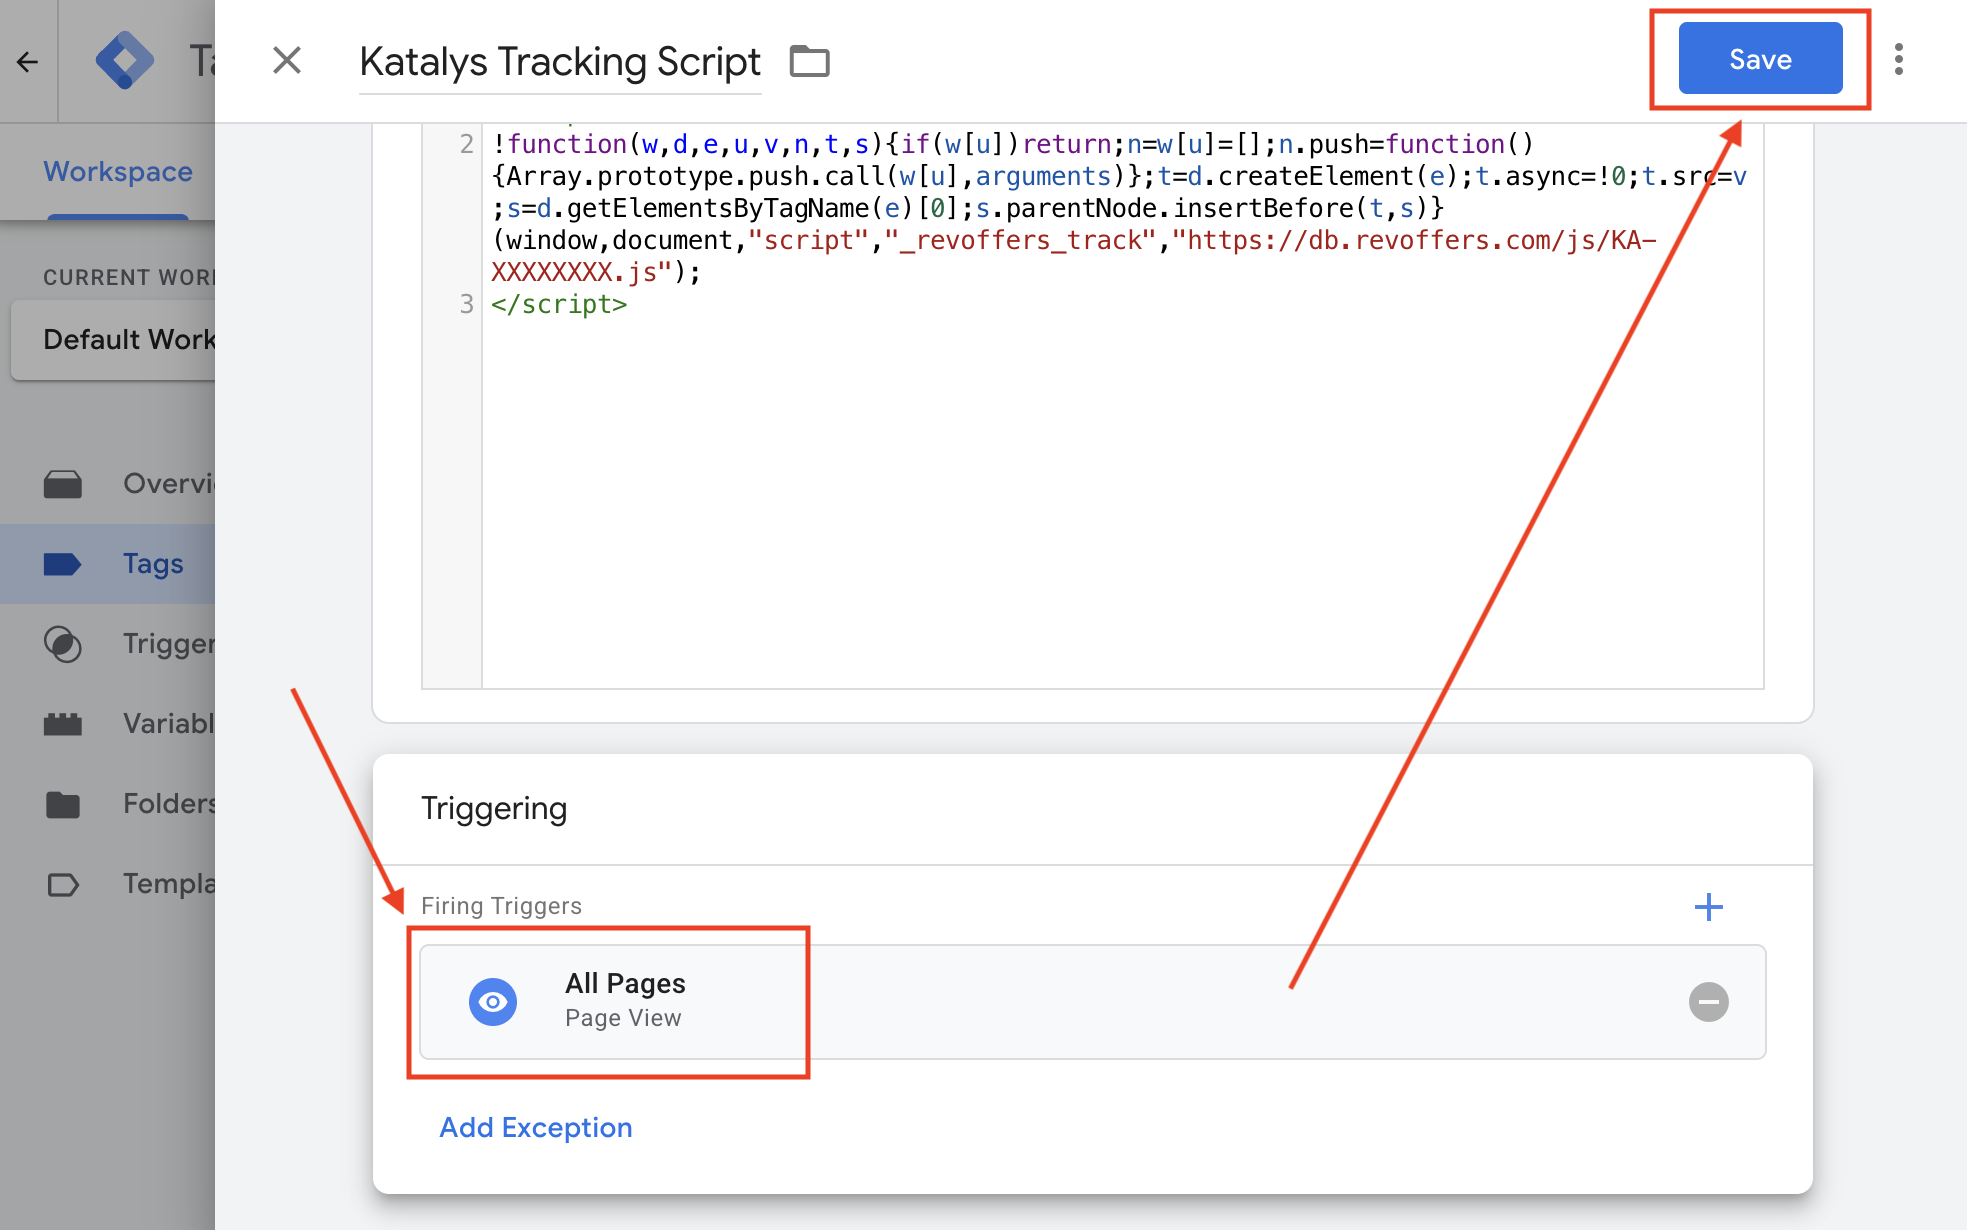
-
Publish the changes to your site
On the workspace “Overview” page, click ‘Submit’. Follow the instructions on the screen to publish the changes to your website.
Verify the tag is firing
You can verify that the Katalys tag is firing by using the “Preview” link on your Google Tag Manager dashboard, loading your website, and ensuring the tag named “Katalys Tracking Script” is firing. You can further verify by following the instructions on the Landing Page Tracking documentation →
Part 2: Order Reporting
To complete this part, you must ensure that the Katalys Tracking Script is running on your post-sale page (same as Part 1), and then use GTM trigger an additional tag that will send Katalys details about the order.
You can include the Katalys Tracking Script multiple times without causing issues, as long as they are the same Tracking ID.
It is important that you report every order to Katalys. You will be billed for only those conversions driven by Katalys. If you selectively report orders, your implementation will be subject to the limitations documented on Cookie-Based Implementation.
Code Example
Each Google Tag Manager implementation is unique. We suggest you follow the template below, but your team must be involved to create the correct code for your GTM setup. Your team must have passed customer and order information into the Google Tag Manager Data Layer on the post-sale page so that you can use those values in Google Tag Manager. Read more about GTM’s Data Layer →
Below is an example implementation showing Order Reporting within GTM. This code worked because the variables used here were defined within Google Tag Manager and then populated by the code running on a checkout funnel.
<script>
_revoffers_track.push({
    action: "convert",
    order_id: "{{Order ID}}",
    sale_amount: "{{Order Total}}",
    subtotal_amount: "{{Order Subtotal}}",
    email_address: "{{User Email}}",
    discount_1_code: "{{Coupon Used}}",
});
</script>
<script>
// using separate <script> tag here in case of JS-parse errors
var lineItems = {{Order Line Item Array}} || [];
for (var i = 0; i < lineItems.length; i++) {
    var item = lineItems[i];
    var obj = {};
    obj['line_item_' + i + '_title'] = item.productName;
    obj['line_item_' + i + '_title'] = item.productName;
    obj['line_item_' + i + '_sku'] = item.SKU;
    obj['line_item_' + i + '_price'] = item.unitPrice;
    obj['line_item_' + i + '_qty'] = item.quantity;
    _revoffers_track.push(obj);
}
</script>
Validating your data is sent
When your tag is working correctly, you should see your data appear within “Payload” section of the Developer Tools.
Review the Thank-You Page Tracking documentation for details →
Since each implementation is unique, it is your responsibility to ensure that the data sent from your Google Tag Manager implementation is accurate. Use our debugging guides on Landing Page Tracking and Thank-You Page Tracking to assist in validating your implementation is working correctly.