Katalys requires you to include a tracking pixel on Landing Pages (for fraud detection and user verification) and on Thank You pages (for capturing conversions).
-
To enable it on your SFCC site, you should include the snippet below in your htmlHead.isml file.

-
Go to Merchant Tools > Site Preferences > Custom Site Preference Groups > Katalys and update Katalys Site Id with your site ID provided by Katalys.

With this, tracking is set. You should be able to see the conversions in the Katalys dashboard.
-
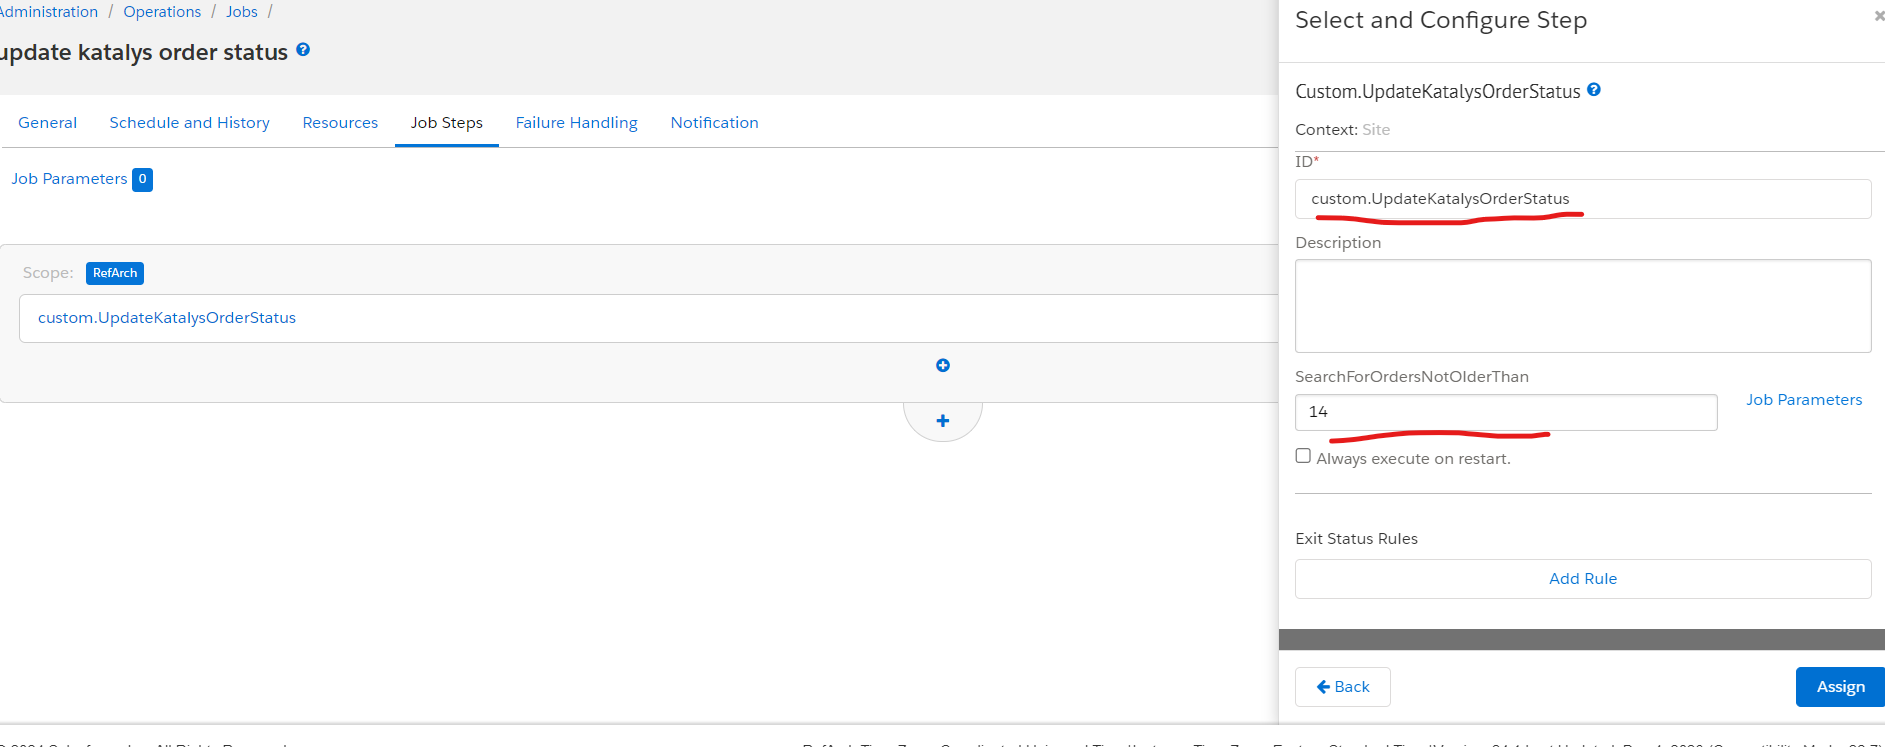
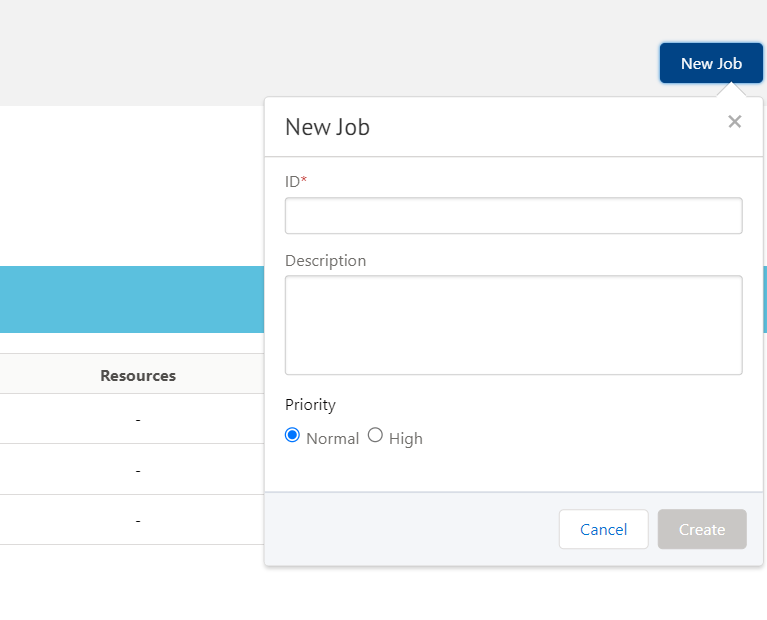
After completing the above steps next is to visit Administration > Operations > Jobs create a new job and give it an ID and a description. eg update katalys order status.
-
When the job is created, click on the job steps to add a step, in the step dialog search for custom.UpdateKatalysOrderStatus and select it and I give it an ID and provide a value for SearchForOrdersNotOlderThan. which specifies the date of orders the job should search for.